You are using an out of date browser. It may not display this or other websites correctly.
You should upgrade or use an alternative browser.
You should upgrade or use an alternative browser.
Repairing and draught proofing sash windows
- Thread starter Mart
- Start date
fernicarry
Member
- Messages
- 555
- Location
- Argyllshire
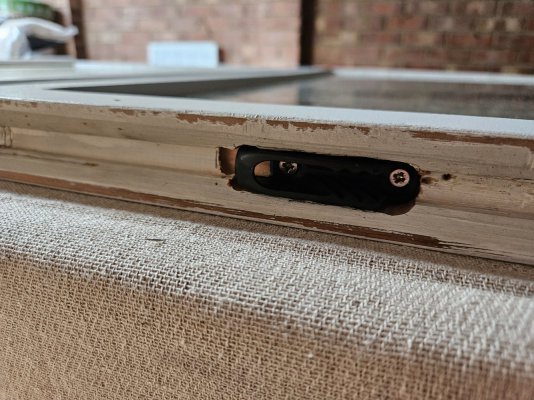
Mighton Cord Grippa works perfectly well for me. No modification needed to the sash. Give it a squeeze with big pliers to make sure it attaches firmly to the cord.
fernicarry
Member
- Messages
- 555
- Location
- Argyllshire
Nice to see a bit of wavy glass.
I was lucky enough to retrieve some old sashes from my next door neighbour's out buildings a few days ago that still had the original glass in them. He was all set to chuck them in a skip...
I was lucky enough to retrieve some old sashes from my next door neighbour's out buildings a few days ago that still had the original glass in them. He was all set to chuck them in a skip...
I like the idea of not having to route out part of the sash as with the grabba , but I can’t get the cord through the slot in the grippa (I have right diameter). Any tips?Mighton Cord Grippa works perfectly well for me. No modification needed to the sash. Give it a squeeze with big pliers to make sure it attaches firmly to the cord.
fernicarry
Member
- Messages
- 555
- Location
- Argyllshire
but I can’t get the cord through the slot in the grippa
Yeah thats a bit of a faff. I expose a couple of inches of the core of the cord and cut that off. The outer braided cotton thats left is a lot easier to thread into the grippa. Pull it through until you have the full thickness in the grippa and trim off the excess.
Generally the little indents hold the cord just fine but occasionally it can slip off so give it a squeeze with a big pair of pliers to close it up a little bit. When you attach the grippa to the screw in the sash make sure the screw head slides up into the "keyhole" so it can't pop back off. You'll hear a click as it locates properly. Handles over 20kg without complaint in my experience.
For the heavy sashes in the centre of my bay I used simplex cord plugs. You do need to drill the edge of the sash with a forstner bit to accommodate the plug but I think thats a lot more manageable and removes a lot less material than the router approach.
HTH.
Can anyone enlighten me why the Cord Grippa makes life easier? When I re-cord my sashes I just knock in a couple of nails to hold it. Takes less than a minute, and in the unlikely event I need to remove the cord within my lifetime (nylon core and cotton outer, so won't snap), it just needs a pair of pliers.
I'm a big fan of widgets that make life easier, but don't see the benefit here. What am I missing?
I'm a big fan of widgets that make life easier, but don't see the benefit here. What am I missing?
I guess for me I like the following.Can anyone enlighten me why the Cord Grippa makes life easier? When I re-cord my sashes I just knock in a couple of nails to hold it. Takes less than a minute, and in the unlikely event I need to remove the cord within my lifetime (nylon core and cotton outer, so won't snap), it just needs a pair of pliers.
I'm a big fan of widgets that make life easier, but don't see the benefit here. What am I missing?
1. They allow the windows to be easily removed after fitting, I've had to do this once so far so rare but easy.
2. Actually fitting is very quick with no need to hammer in nails whilst holding a sash and the cord in place.
3. They are predictable, each window is the same with no variables that would come with hammering 4-6 nails per sash.
They're also really cheap so not like a huge cost. I think they just make the process ever so slightly easier overall.
Thanks Mart, makes senseI guess for me I like the following.
1. They allow the windows to be easily removed after fitting, I've had to do this once so far so rare but easy.
2. Actually fitting is very quick with no need to hammer in nails whilst holding a sash and the cord in place.
3. They are predictable, each window is the same with no variables that would come with hammering 4-6 nails per sash.
They're also really cheap so not like a huge cost. I think they just make the process ever so slightly easier overall.
Stevers
Member
- Messages
- 641
- Location
- Mendip Hills
This is my bathroom window up on the top floor showing my 'old mans' solution to draught proofing. It's just a strip of Stormguard V-Seal tape run down the top half of the outside groove, and bottom half of the inside groove against the staff bead, with one more strip along the top of the frame to seal that. The seals cope with gaps from 1 to 8mm and it's fitted all the windows I've tackled so far. The sashes are pushed together minimising the gap between sashes, but still allows condensation to drain. Rattles are practically banished. It is easily cleaned, helps the sash to slide and can be removed with warmth from a hair drier for painting. It works out at less than £5 a window and is of course completely reversible. I've also banished the draughts through a French Window and a number of doors with it - inside and out.
https://www.stormguard.co.uk/stormguard-products/v-seal/
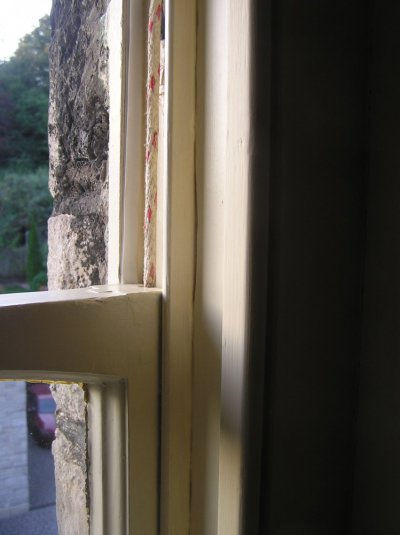
These windows (1879) have a Regency vibe with that lambs tongue moulding, they only have the horns where you need them on the top sash, but are Victorian in that the larger sashes only have a single central glazing bar that is vanishingly slim. To secure the cords there's a hole at the end of the groove with room to take the knot at the other end, a feature I really appreciate when working on them.
https://www.stormguard.co.uk/stormguard-products/v-seal/

These windows (1879) have a Regency vibe with that lambs tongue moulding, they only have the horns where you need them on the top sash, but are Victorian in that the larger sashes only have a single central glazing bar that is vanishingly slim. To secure the cords there's a hole at the end of the groove with room to take the knot at the other end, a feature I really appreciate when working on them.
Stevers
Member
- Messages
- 641
- Location
- Mendip Hills
Yes, with the idea that the cold air would blow the flap open and close any gap. It does seems to work like that... You need some ventilation and I like to think this might be just the right amount for a room where no cooking or laundry is carried out.I like that approach Stevers - think I might follow suit on the windows that I'm not going to get around to this year before winter sets in. From your photo it looks like you have the "V" facing towards the frame?
Last edited:
Another couple done, finally tackled the one I was worried about. After cleaning up the rot I decided to go with the 2 part resin to repair. Turned out very well indeed, its amazing how far gone a window can be and still repaired.
Historical repairs mean I couldn't run the parting bead as low as I'd like.
I'm suspecting the damage was mainly due to a gutter leak and overgrow plant but will be keeping a close eye on this window over the winter.
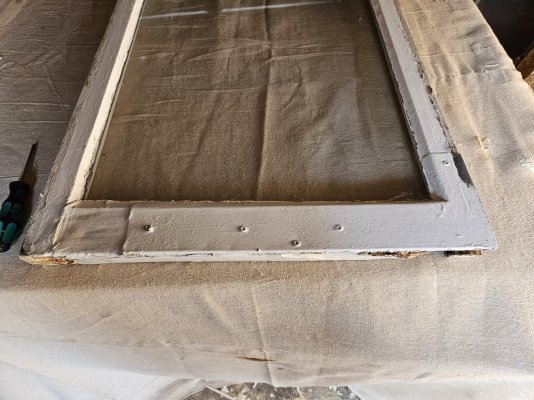
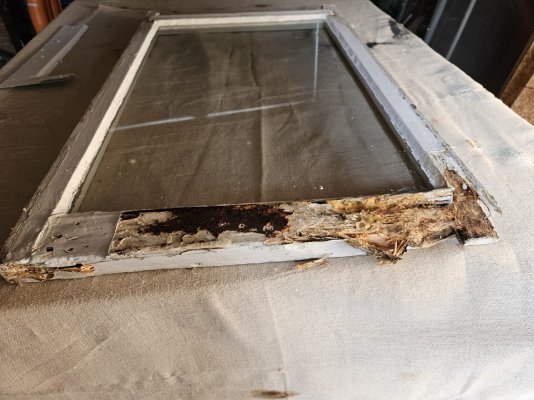
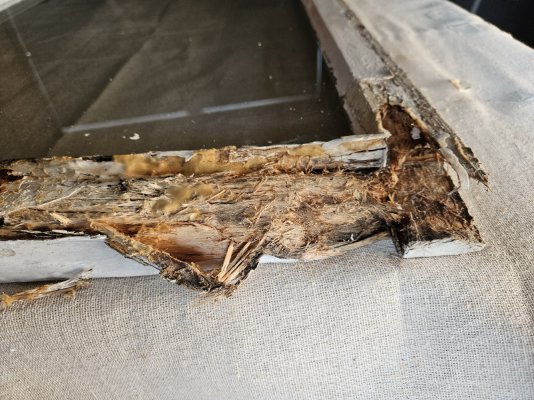
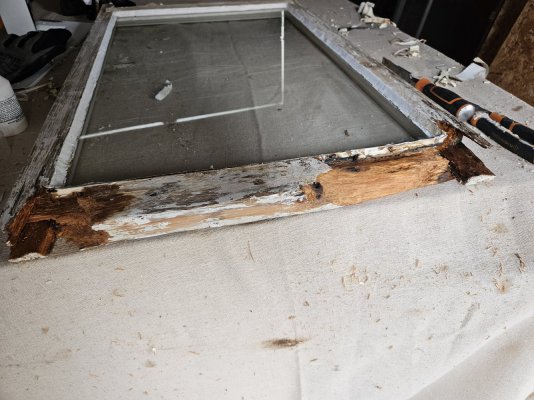
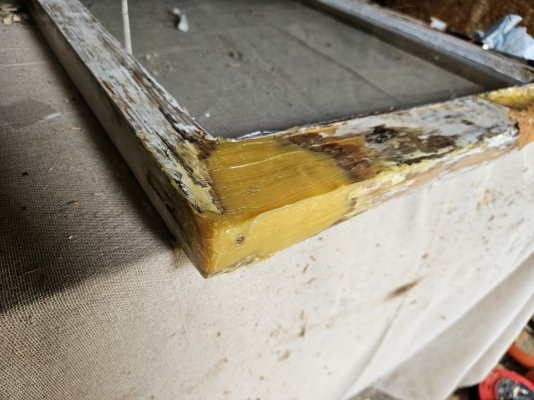
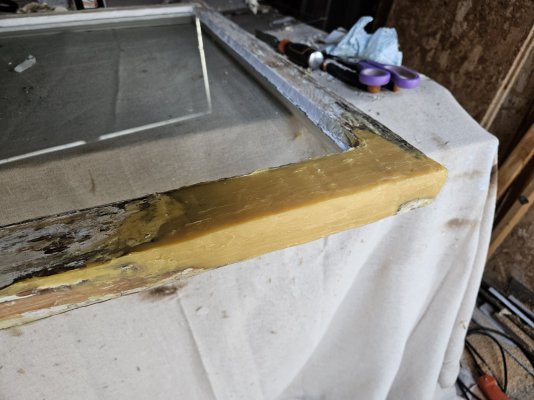

Historical repairs mean I couldn't run the parting bead as low as I'd like.
I'm suspecting the damage was mainly due to a gutter leak and overgrow plant but will be keeping a close eye on this window over the winter.


MartAnother couple done, finally tackled the one I was worried about. After cleaning up the rot I decided to go with the 2 part resin to repair. Turned out very well indeed, its amazing how far gone a window can be and still repaired.
Historical repairs mean I couldn't run the parting bead as low as I'd like.
I'm suspecting the damage was mainly due to a gutter leak and overgrow plant but will be keeping a close eye on this window over the winter.
View attachment 11489View attachment 11491View attachment 11492View attachment 11490View attachment 11493View attachment 11494View attachment 11495
What type/brand of Resin are you using
malcolm
& Clementine the cat
- Messages
- 1,839
- Location
- Bedfordshire
That's a lot of wood to replace with resin. You only need a chop saw to make a new bottom rail and scarf in repairs to the uprights and have an all wood window. Wood is always trying to find ways to let water out and the water will tend to build up at the join to the resin.
Having said that I have a bay window where the sill has been replaced with concrete sill and I've no intention to make it wood as it works well enough as it is.
Having said that I have a bay window where the sill has been replaced with concrete sill and I've no intention to make it wood as it works well enough as it is.
I have a chop saw, would be interested to hear how i could make a bottom rail with one. I can imagine how you'd cut the tenons but not the sloped bottom.That's a lot of wood to replace with resin. You only need a chop saw to make a new bottom rail and scarf in repairs to the uprights and have an all wood window. Wood is always trying to find ways to let water out and the water will tend to build up at the join to the resin.
Having said that I have a bay window where the sill has been replaced with concrete sill and I've no intention to make it wood as it works well enough as it is.
Oxera repair - really impressed with it so far and keenly priced. The 4 hour rebuild resin comes in useful pots.Mart
What type/brand of Resin are you using
I have a chop saw, would be interested to hear how i could make a bottom rail with one. I can imagine how you'd cut the tenons but not the sloped bottom.Oxera - thanks
Oxera - thanks
I have a bottom rail (re)-repair to do...
It was in bad shape and had warped - so even with splicing timber and filling it (Hand Up - I used Ronseal 2 part) ; its cracked
(Its south facing and bears to full brunt of the Sun)
I'm tempted to do one more repair - and use a Top Tier Resin, but had also considered a new bottom rail altogether
I haven't checked whether this is the right size etc - but more a point of showing these type of things exist
Sash Window – Meranti Sash Bottom Rail 44 x 95mm x various lengths | Chiltern Timber
It's early days but I'm happy with Oxera.Oxera - thanks
I have a bottom rail (re)-repair to do...
It was in bad shape and had warped - so even with splicing timber and filling it (Hand Up - I used Ronseal 2 part) ; its cracked
(Its south facing and bears to full brunt of the Sun)
I'm tempted to do one more repair - and use a Top Tier Resin, but had also considered a new bottom rail altogether
I haven't checked whether this is the right size etc - but more a point of showing these type of things exist
Sash Window – Meranti Sash Bottom Rail 44 x 95mm x various lengths | Chiltern Timber
www.chilterntimber.co.uk
I actually looked in to Chiltern timbers unfortunately my frames are 37mm deep.
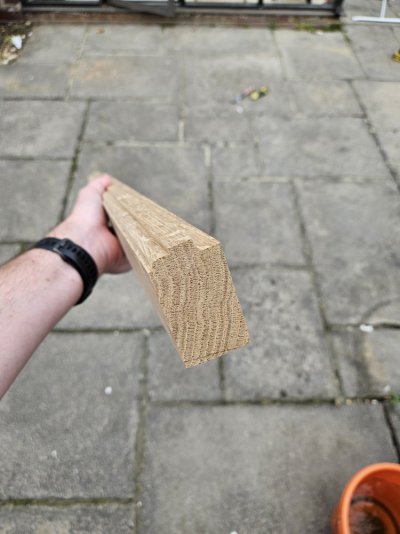
I got an oak bottom rail made but have so far not used it, if the resin doesn't work on the bad window this will be my next option.
